With shelter at home orders in place all across the US, many small businesses have had to pivot and figure out how to do things online quickly in order to continue to serve customers. A good friend of mine sells her produce and products at Farmer’s Markets in Northern California. While they are deemed an essential worker and are still selling their amazing apples and cider at many Farmer’s Markets, she was saddened, yet understood that some customers didn’t feel safe coming to see her. She also wanted to help out friends and neighbors in her home town by providing free delivery or curbside pickup from her home. The orders from friends started flooding in and she was having a hard time keeping up with the many text messages, Facebook messages or emails she was receiving with orders. I suggested an easy and inexpensive fix to streamline things – Google Forms.
Team WMT have been Google fans forever – from Gmail to Analytics to Adwords to Drive. All these tools are wonderful options for the small business owner and many are free or relatively inexpensive, yet offer robust ways to support your business. Presented with the above dilemma, I knew instantly how to help my friend and wanted to share this tip with you! With just a few steps and a gmail address, we had an easy way for her to collect the information she needed.
Step 1 | Organize
Gather a list of all the information you want to collect. For example our list looked like this: Name, email, order information, payment information, delivery or curbside pickup and additional notes.
Step 2 | Get Started
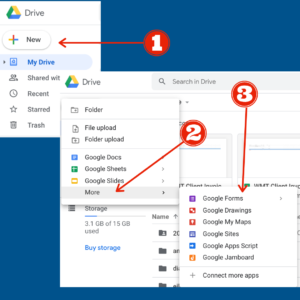
If you don’t have a gmail personal or business email, create one and then head over to Google Forms (which can be found in Drive). Click on New>More>Google Forms.
Step 3 | Create Form Layout
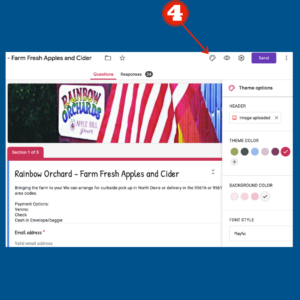
Set up your form. Select your theme color by clicking on the Palette Icon. Choose a color that is on brand or if you know your brand colors, you can enter in the exact Hex color code. Upload your logo or an image for the header, choose a background color and select a font. Now your template is ready to go.
Step 4| Add Sections and Questions
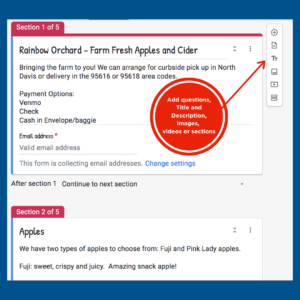
Let’s add more information. Using the navigation bar on the right side of your screen, You can add sections to keep the information better organized. I like to add an introduction section so people know what to expect as they fill out the form.
Step 5 | Fine Tune
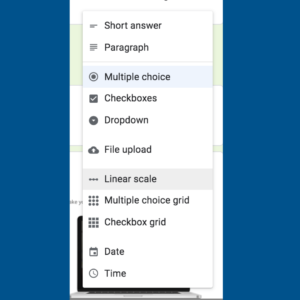
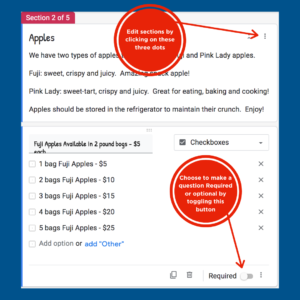
Fine tune your sections. For each section you have tons of options. You can choose multiple choice, checkboxes, paragraph answers, drop downs and more. Each question can be customized based on your own needs. You can choose whether a section is required or if it can be skipped by toggling the Required button.
Step 6 | TEST!
Once you have finished the form, take the time to test it a few times, going through each question and looking at it from a visitor’s point of view. Send the link to a few co-workers and have them test it. You want to make sure it functions how you wanted. It’s easy to make edits even after the form has been shared, but testing it will minimize the need to make changes later.
Step 7 | Send
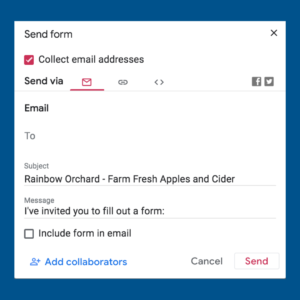
Now you are ready to start sharing your form. You can send out your form through email directly in Drive, by sharing a link on social media or through your own email platform or you can embed a link on your website.
Step 8 | Collect Information
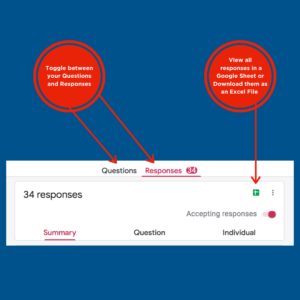
You can choose to get an email notification every time someone fills out your form, or you can simply visit the link to your form in Drive and review your collected information there.
Your physical building may be closed, but it doesn’t mean you can’t continue to serve your customers through creative and simple solutions!
Marketing solutions don’t have to be spendy, there is no better time than now than to be creative!
Happy marketing!
