
There’s not a lot that’s more empowering than being able to take control over certain aspects of your own website. At Web Marketing Therapy, we encourage and love seeing business owners learn how to take control of their own blogs. Blogs can be deeply personal for a company. It can be an outlet to really show the personality and value of a brand.
Sometimes creating a WordPress blog can be daunting (especially if you’ve never worked in a program like WordPress before). Luckily creating WordPress blogs can be a painless process and we’re here to help you along the way!
In this post, we share how-to’s and also best practices to ensure more search visibility, credibility and sellability from your WordPress blog posts!
Step 1 | Setting Up the Blog Post
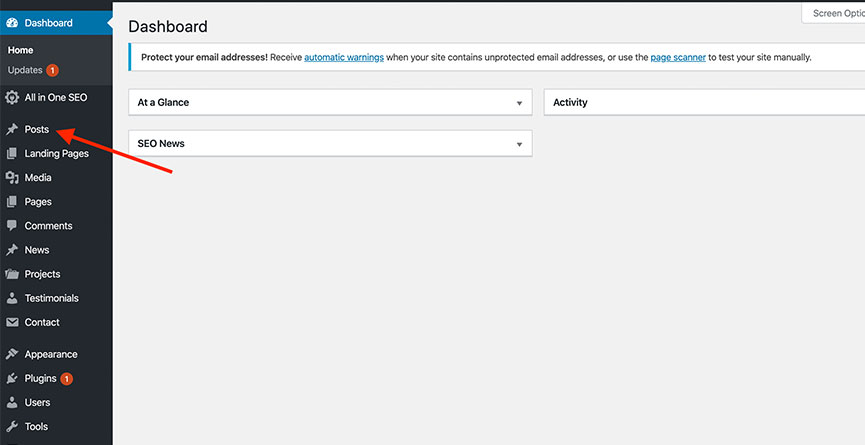
The first step (like with every online program) is that you need to sign into your WordPress account. Once you’ve signed in you’ll be presented with the dashboard.
1. Click Post in the sidebar
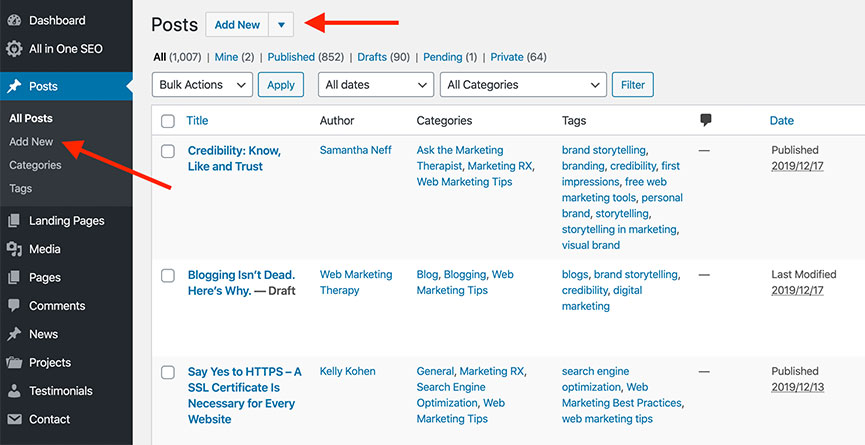
2. Once you’re on the post’s page you’ll want to select Add New. You can do this by either clicking Add New in the black sidebar under “All Posts” or you’ll click Add New at the top of the page near “Posts.”
Step 2 | Writing the Blog Post
Now that you’re in your blog post page, it’s time to write the blog post! Here are some tips to help you get started:
- Make sure you are working in the Visual tab (see screenshot below)
- Title: Title of the blog post
- Note: The blog title becomes the permalink (which is the url address). Make sure that it always matches the blog title.
- Body: Body of the blog post. You can insert images in the body and in the Featured Image section (recommended).
- Note – copying and pasting text from word into the blog will create programming errors. Paste the content into a Notepad (PC) or TextEdit > Plain Text (Mac)
Step 3 | Adding Media
Adding media is simply adding an element that isn’t text to the body of your blog post. This could include images, pdfs, and even video.
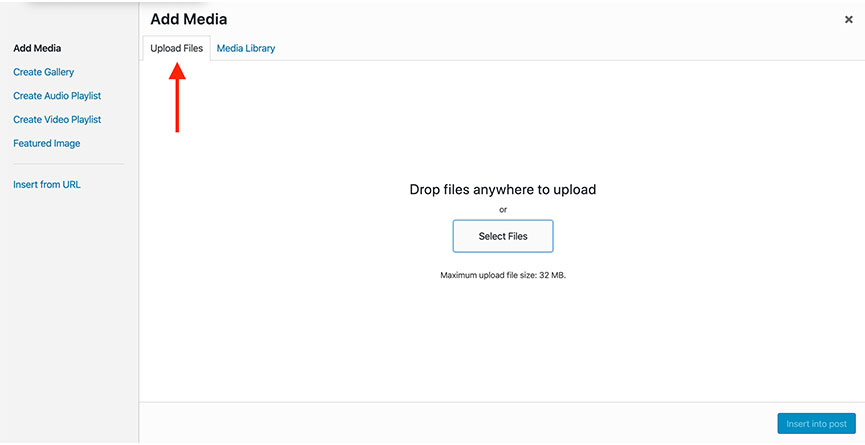
1. To add an image IN the post, click the Add Media

2. If you would like to Upload an Image. Select the Upload Files Tab and either drop your file into the box or click select files and find your image.
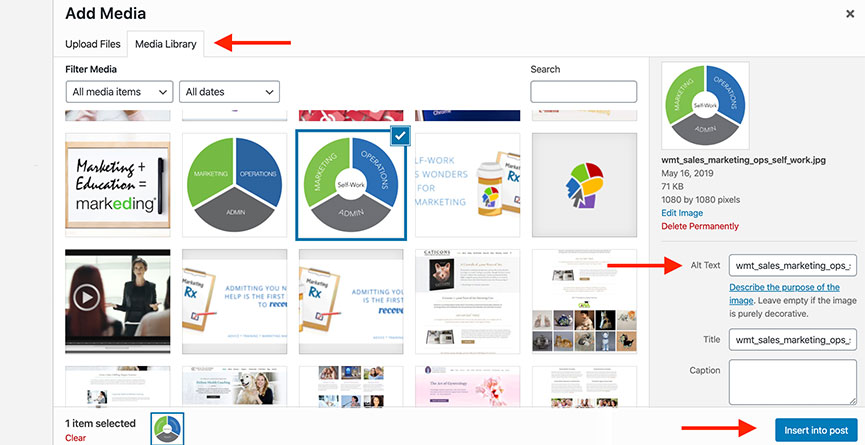
3. Once you’ve uploaded your file this screen will appear. Make sure to fill out the Alt Text Section. Once you’re done click insert.
Note: The name of the image should be the same as the Title of the blog post. The same applies when adding Alt tags. Ex. A blog post called My Blog Post would have a featured image called my_blog_post.jpg 11.
Step 4 | Adding a Featured Image
It’s extremely important to add a featured image to your blog post. A featured image will appear next to your blog post when posting to social media as well as on your blog page. We live in such a visual time that not having images with your content may hurt you in the long run. Here are a few notes before we get started:
Choose a Featured image that you believe will relate to your blog post the most. A great place to find images are sites such as Unsplash, Pexels, and Pixabay.
Notes: The image can be 864px wide max. The height of the image is optional but something around 475px will look nice on your blog.
- Be sure to “save for web” (72 dpi), if using a program such as Photoshop, for the images to cut down on the file size.
- Remember to add Alt tags and the name of the image should be the same as the Title of the blog. Ex. A blog post called My Blog Post would have a featured image called my_blog_post.jpg 11.
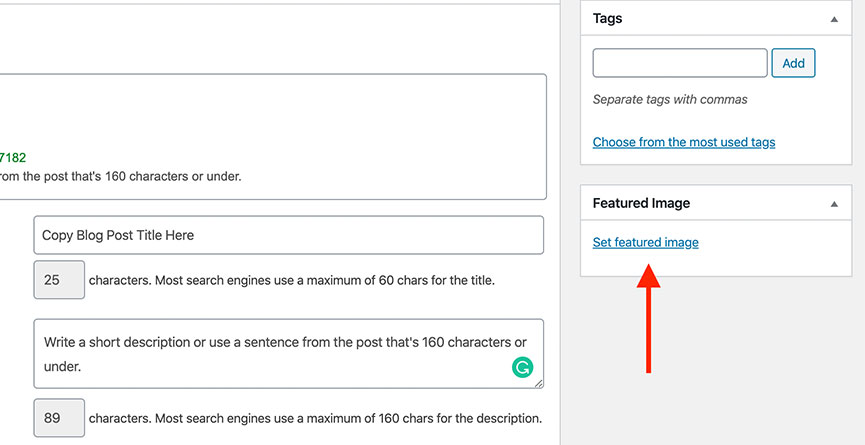
1. Click Set Featured Image.
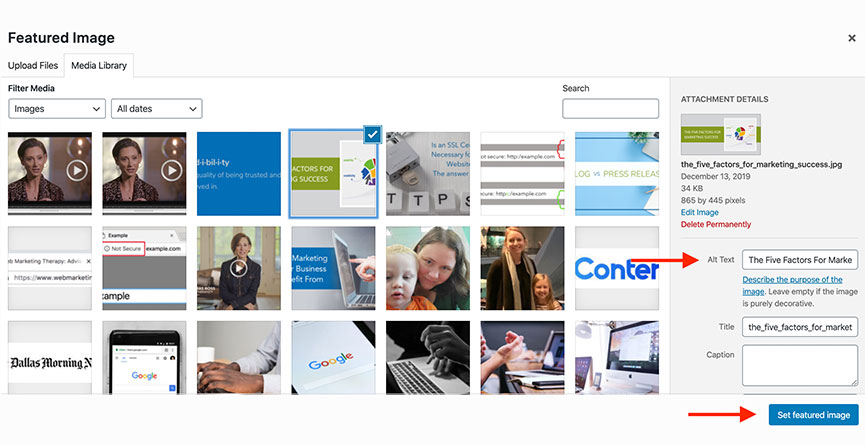
2. If you want to Upload an Image. Select the Upload Files Tab and either drop your file into the box or click select files and find your image. Once you’ve uploaded your file this screen will appear. Make sure to fill out the Alt Text Section. Once you’re done click insert.
Step 5 | SEO Pack
Completing the SEO pack is arguably one of the most important elements of a blog post. Basically this is what helps your website get noticed by Google and can bring you to the first page of the Google Search results (which you’ll want!).
1. Make sure the All in One SEO Pack, Categories and Tags are set! Complete the All in One SEO Pack. Copy the Title from the top into the SEO Title and write a short description or use a line from the post.

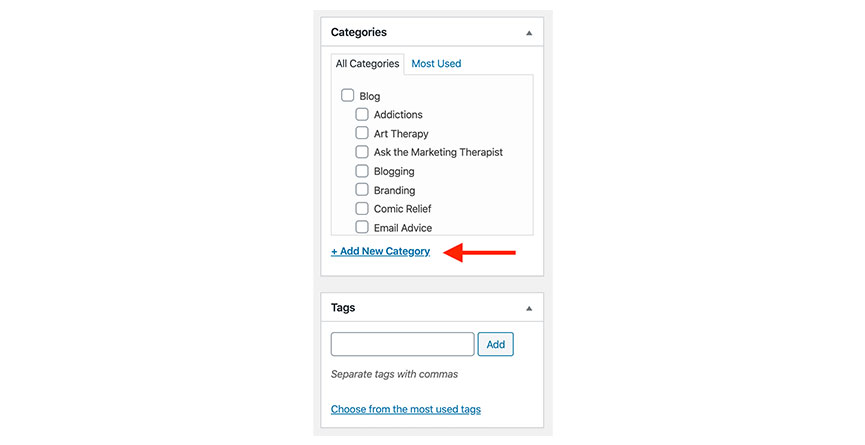
Step 6 | Adding Categories
1. Choose Categories: Select the topic of what the blog post is about. You can choose more than one. Add tags (words or phrases that describe the post). Use commas in between each word before you hit enter.
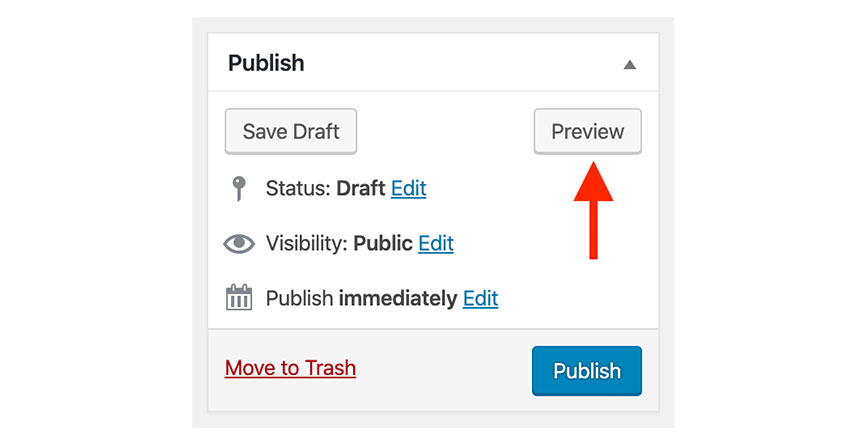
Step 7 | Previewing and Publishing Your Blog Post
We’re finally at the final steps of creating your WordPress Blog: Previewing and Publishing it!
1. Once you have all the elements of your blog post in place you can (and we extremely recommend) previewing your post. You can do this by clicking Preview and an example of your post will appear for review.
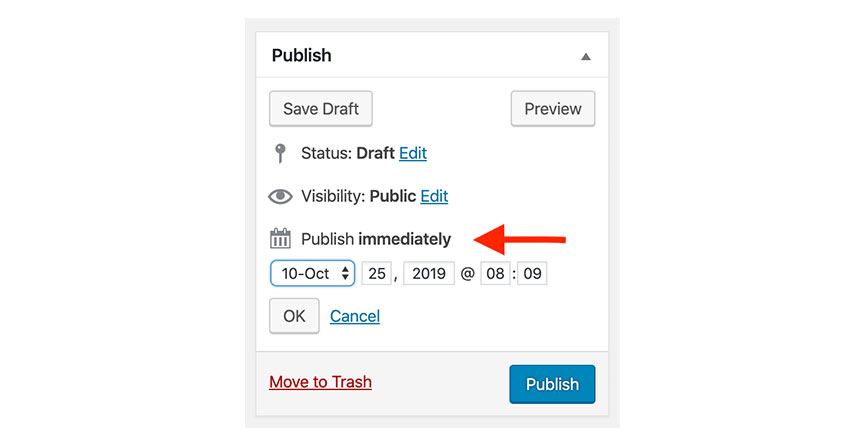
2. If entering older news publications, you can edit the Publish Date in the Publish Panel. To edit the date Click edit (it will be in blue next to publish immediately) then you should see the image below. Enter Your preferred Time and date then hit publish.
Note: If you’re not quite ready to Publish your work but want to save it you can select Save Draft which will save your work.
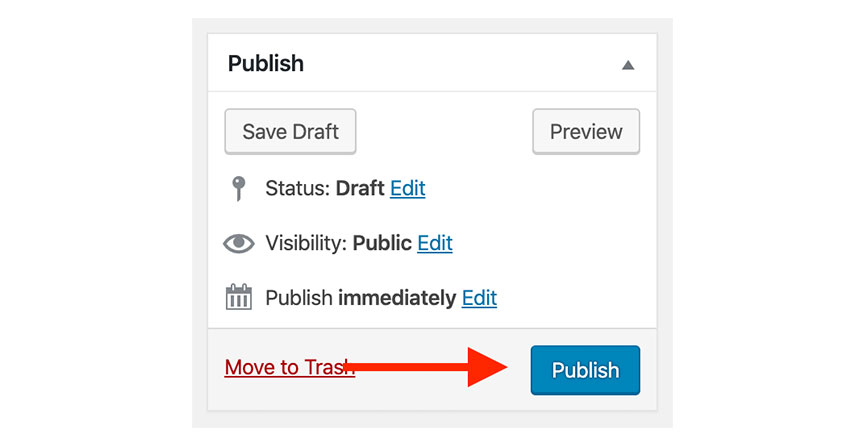
3. If you don’t need to change the date Click Publish and it’ll publish immediately.
Then you’re done. Congrats you’ve published a blog post by yourself! Not only have you learned a new skill but now you have one more asset for your business. Reward yourself for your hard work and keep blogging!